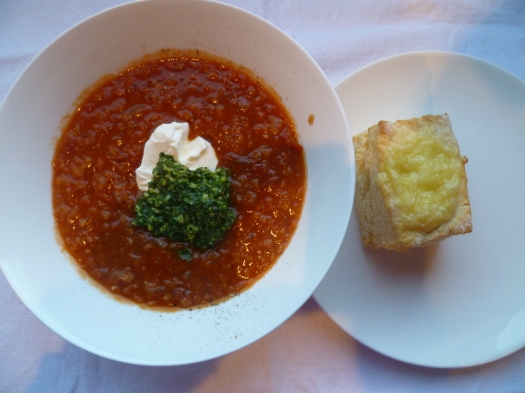
Tomato and Lentil soup with food processor cheese scones

baking, budget, soup, Vegetarian, weekend

I have shared this recipe with a lot of people before, but it is still our favourite soup. Both girls like it, although Miss 6’s version of “like” is to eat two helpings of it, while Miss 4’s version is to dip her scone in it! It is cheap, can be vegetarian, full of protein and great for winter lunches and dinners. It takes a little bit longer than 45 minutes to make, so may not be suitable for busy week days.

I always make scones in the food processor – much easier than rubbing butter in and getting covered in dough! These go really well with the soup, and make instant dessert with jam or marmalade on them.

P1060794

Soup

2 T oil

2 onions, finely chopped

2 t crushed garlic

2 t smoked paprika (one of my favourite spices!)

2 x 400g tins crushed tomatoes

6 c stock (beef or vegetable)

1 1/2 c red lentils

1/3 c tomato paste

1 T brown sugar

Coriander and/or sour cream to serve for adults

Scones

3 c flour

6 t baking powder

100g butter, cubed

3/4 c grated tasty cheese

1 1/2 c milk

grated cheese to sprinkle on top

Soup

1. Heat oil in a lot on low heat. Add onion and garlic and saute stirring until onion is soft.

2. Add the paprika and cook for a few seconds.

3. Add all other ingredients except for the coriander/sour cream and simmer for around 45 mins until lentils and mushy and cooked. Stir occasionally to avoid lentils sticking to the bottom.

4. For the kids I put theirs in the fridge for 5 minutes to cool down more quickly. For the adults serve with cracked black pepper and sour cream and/or coriander. I used coriander pesto in the picture as I had some in the freezer I had made.

Scones:

1.Turn oven to 200 C fanbake and grease an oven tray.

2. Add the flour and baking powder to the food processor and pulse to mix.

3. Add the butter and cheese and pulse to combine.

4.  Add the milk and pulse to mix. Your dough should be a bit sticky but not runny.

5. Turn the dough onto a floured surface. Turn to coat both sides in flour and then roll out to 2 – 3 cm thickness.

6. Cut into squares and place on the greased tray. Top with grated cheese.

7. Cook for around 10 mins. They should be golden and cooked through.

8. Serve scones on the side of the soup – great for dipping!

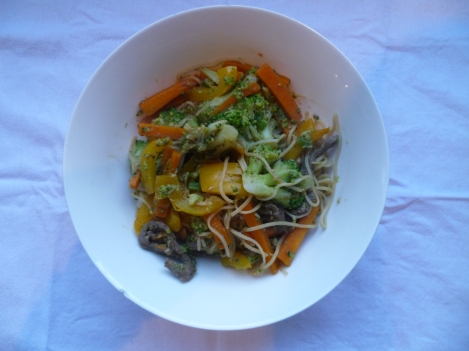
Broccoli and Beef Noodles

Asian inspired, fast

My girls love noodles, but a lot of asian inspired recipes are too complicated and spicy for them. Both gobbled these up so I hope they are a hit with your little ones.

P1060791

Sauce:

3 T soy sauce

1 t fish sauce

1 T tomato sauce

1 t crushed garlic

1 t crushed ginger

1 T vinegar

1 t brown sugar

Noodles and vegetables:

1 T oil

2 carrots, julienned

1 capsicum, julienned

1 head of broccoli, cut into small florets

250g dried noodles

400g beef schnitzel, cut into thin strips

3 spring onions, chopped

1. Mix all the sauce ingredients together.

2.Boil a pot of water, cook noodles as long as instructions say. Add broccoli to the pot to cook around 3 – 5 mins.

3. Heat a frying pan to medium-high heat. Add carrots and capsicum and cook for 3 mins, stirring often.

4. Add the schnitzel and brown.

5. Add the drained noodles and broccoli, sauce mixture and spring onions. Cook over medium heat for 3 mins, stirring with tongs to mix.

6. Serve in bowls.

Noodle hint for littlies: If the noodles are really long and difficult to handle I get some scissors out once I have served them and chop them shorter. This makes them easier for little ones to scoop them into their mouths.

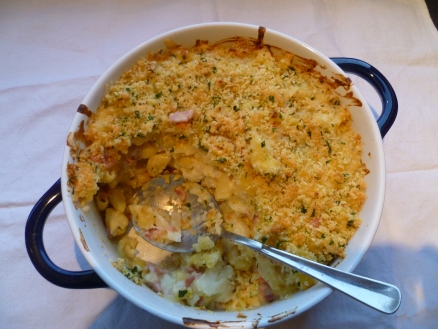
Cauliflower and Macaroni Cheese

pasta

When I was a child Sunday night was the only time we were allowed to eat dinner in front of the TV. I have memories of watching Disney movies, Dukes of Hazard and MacGyver. It was also a night of comfort food – macaroni cheese, cauliflower cheese and soup and homemade bread being favourites.

This is a combination of 2 of those foods – macaroni cheese and cauliflower cheese. It mostly contains things you are likely to have in the cupboard, and you could substitute different ingredients if you don’t have some of them. So hop in the kitchen and MacGyver up some dinner from whatever you can find in there!

P1060790

Cauliflower and Macaroni Cheese

400g macaroni

1 T oil

200g bacon, chopped

1 onion, chopped

1/2 cauliflower, chopped into small florets

3 T butter

3 T flour

2 c milk

3/4 c grated tasty cheese

Topping:

1 T butter, melted

1 c breadcrumbs

1/2 c grated tasty cheese

2 T chopped parsley

  1. Heat oven to 200 C fanbake.
  2. Bring a pot of water to the boil and add the macaroni. Cook for 3 mins. Add the cauliflower to the pot, or I put them in a steamer over the macaroni. Cook cauliflower and pasta for 8 mins. Drain well.
  3. While this is cooking heat oil in the frying pan and add onion and bacon. Cook, stirring occasionally until onion is soft.
  4. For cheese sauce melt butter in a pot over a lowish heat. Use a whisk to stir in flour off the heat, the whisk helps avoid lumps in the cheese sauce. Put back on the heat and slowly add milk, stopping to whisk it into the sauce. Take off the heat if you need to. Keep going until all the milk is mixed in and it is thickened. Add cheese and mix in.
  5. Combine macaroni, cauliflower, bacon and onion and cheese sauce. Place in a large oven dish.
  6. Mix topping ingredients together and sprinkle over pasta. Bake for 20 mins until golden and crispy.

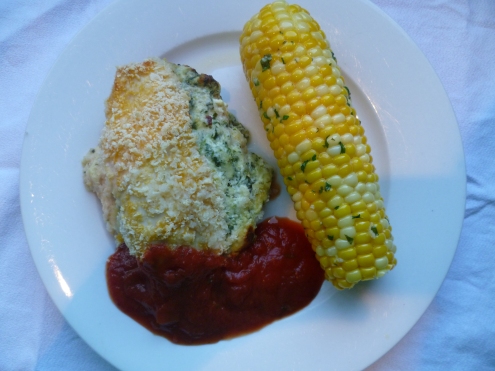
Spinach and cheese stuffed chicken breasts with garlic corn

chicken, vegetables

If you have any form of milk allergy or intolerance these recipes are not for you!  Normally I like my corn au natural, but it is getting very much to the end of the corn season and it doesn’t taste as good as it did a couple of months ago. This recipe is a good way of making corn that is a bit past its prime taste delicious.

My husband loved the chicken and I think it almost made up for cooking fish last night!

P1060788

Stuffed Chicken Breast

125g cream cheese

1/2 bag spinach

1 c grated mozzarella

1/4 c grated parmesan

2 T pesto

3 chicken breasts,softened

1 egg

Bread or panko crumbs

250g pasta sauce

Garlic Corn

3 – 4 cobs corn

50g butter, softened

1 t crushed garlic

1 T parsley

  1. Heat oven to 180 C.
  2. Bring some water to the boil in a steamer and steam spinach for 3 mins. Get all of the water out of the spinach by putting it in a sieve and pushing down on it with a spoon.
  3. Add the cheeses and pesto to the stuffing and mix well.
  4. Slice the chicken breasts almost the whole way through horizontally. Fill with the stuffing. It will probably ooze out but that’s OK.
  5. Beat the egg in a bowl. Place the crumbs on a plate.
  6. Brush the top of each breast with egg and dump on the crumbs. Rub around to coat. Brush the other side with egg and turn around to coat.
  7. Place in a greased oven dish and cook in the oven for around 35 – 40mins, until cooked through. One of the breasts is to slice in half for 2 children, so you can cut this in half to check they are completely cooked.
  8. While the chicken is cooking, get the butter for the corn ready. Add the garlic and parsley. Use a knife to spread butter all over each cob, but not too much. Wrap each piece in foil and add to the oven , cooking for 25 – 30 mins.
  9. To serve heat up the pasta sauce and serve a little on the side along with a cob of corn – yum!

Fish Burgers with kumara chips and coleslaw

burgers, fish, salad

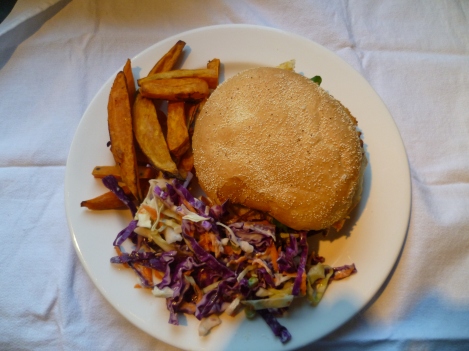
My husband hates fish. Sometimes I am nice and organise an alternative protein for him, like steak. Sometimes I ignore the fact that he doesn’t like fish and cook it anyway as both girls and I love it! This burger would work fine with a steak if you have a non-fish eater in the house, I would just use some relish or mustard to top it rather than tartare sauce.

P1060787

Fish burgers and kumara chips

3 – 4 medium kumara, chopped into chips

3 T oil

4 baps (soft white bread rolls)

tartare sauce

rocket, lettuce or other salad greens for burgers

2 large fillets of terakihi or other suitable fish

Flour on a plate mixed with 1 t garlic salt (fish coating)

1 egg, beaten in a bowl (fish coating)

Breadcrumbs or panko crumbs on a plate (fish coating)

tartare sauce

Coleslaw

1/2 small cabbage (I used a 1/4 each of a white and a red cabbage), sliced thinly and then chopped into smaller bits

1 t sugar

2 pinches salt

2 spring onions, chopped

2 carrots, grated

2 – 3 T mayonnaise

1. Turn the oven to 200 C fanbake and put an oven dish in to heat.

2. While the oven is warming place the chopped cabbage in a bowl, sprinkle with the sugar and salt and toss through. Stand to the side. The sugar and salt helps the cabbage soften and wilt slightly. If you don’t want to add these, just skip this stage.

3. Once the oven is heated add 2 T oil to the oven tray and leave to warm for about 3 – 4 minutes. Add the kumara chips. Toss these every 10 mins until golden and crispy, they will take about 25 mins total.

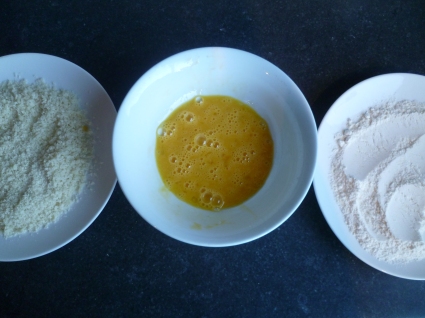
4. While the kumara chips are cooking prepare the fish. Set up your 3 plates for coating – flour, then egg, then breadcrumbs.

P1060786

5. Chop the fish fillets in half – I used the smaller sides for the girls and the larger sides for the adults. Heat the frying pan on medium heat.

6. Coat each fish fillet thoroughly in flour, then egg, then breadcrumbs. Add 1 T oil to the pan and heat. Fry on both sides until golden and cooked through. I coat the fattest fillets first and place them in the pan as they take longer than the little skinny ones.

7. While the fish is cooking finish the coleslaw by adding all other ingredients to the bowl and tossing well to coat in mayonnaise. You will need 2 – 3 T mayonnaise depending on the size of the cabbage.

8. Put the baps in the bottom of the oven for about 3 mins to warm under the oven dish – you don’t want them going too crispy.

9. Construct the burgers: Place salad greens on the bottom of the burger bun, top with a fillet of fish (you may need to chop it in half to fit) and top with tartare sauce. Serve with kumara chips and coleslaw on the side.

Hint: If you have little people whose hands struggle to hold a burger you can serve them a deconstructed burger – half the bun and the fish separately. Miss 4 is only just starting to be able to eat a burger without losing the contents out the bottom!

Corn and Potato Pizza with quick spinach salad

Vegetarian

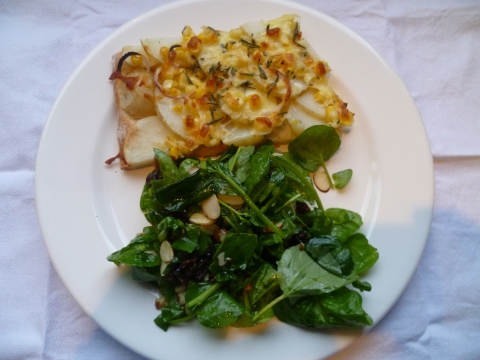
While I was on my OE in my 20s I visited my cousin who was an exchange student in Italy. We spent the evening with her host family, who served us up a variety of pizzas. If I had not eaten corn and potato pizza in Italy, I would not have thought it was authentic! Miss 6 gobbled this up and it must have been tasty because she insisted it had bacon on it, but it is entirely vegetarian. I have no idea if this is an authentic version, the original eating experience was 12 years ago now, but my family enjoyed it!

P1060785

Pizza Base

You could use bought bases, but this recipe is sooo easy and quick!

3/4 c warm water

2 T sugar

2 t yeast

1 T oil

2 c flour

1/2 t baking powder

Pizza toppings

1 cob of corn, kernels cut off the cob (you could use tinned or frozen corn)

1/2 red onion, sliced

4 medium potatoes, scrubbed and very thinly sliced

1 1/2 c grated cheese (I was flash and used mozarella – but any will do)

3 T chopped rosemary

Sea salt to sprinkle on top

Salad

1 big handful baby spinach leaves

1 big handful rocket or watercress leaves

2 T raisins

2 T sliced almonds

1 T olive oil

Juice of 1/2 a lemon

  1. Mix the water, sugar, yeast and oil together and stand, covered until frothy, about 10 mins. Grease an oven tray. Turn oven to 200 C fan bake.
  2. While this is happening prepare the pizza toppings. Slice the potato VERY thinly (if it is too thick you will have crunchy raw potato as it isn’t in the oven long). Cut the kernels off the corn, grate the cheese, slice the onion thinly and chop the rosemary.
  3. Once the water and yeast is frothy pour it into a large bowl (if it isn’t in one already) and mix in flour and baking powder. Pour onto a floured bench or board and knead briefly to make into a dough.
  4. Roll out the dough thinly on a floured surface to fit the oven tray – it should cover most of the tray if rolled thinly.
  5. Top with the potato by making a circle of slices on the edge of the pizza and working your way inwards. Overlap each circle very slightly. Top with corn, then onion, then cheese, then rosemary and salt.
  6. Bake in the oven for 12 mins. I would check after 10 mins as each oven is slightly different and you don’t want dark brown edges! You want the top to be golden, the whole base to be cooked through and the potato to not be raw.
  7. While the pizza is cooking toss all the salad ingredients together. Lemon hint:
    Drain the juice through your slightly opened fingers to avoid getting the pips in it – like a built in sieve.
  8. Serve pizza with salad on the side (see note on kids and veges below).

Note on veges and kids and corn in the microwave: There is no way my girls would eat this salad. One of the challenges of cooking for kids is that there are often limited vegetable options they will eat and they get pretty boring after a while! Miss 6 will eat most veges including lettuce salad, Miss 4 has a more limited list. I can generally get her to try things, but not eat copious amounts of new vegetables, and all raw veges except for cucumber get spat out after she has chewed them for a while! I served my girls up half a a cob of corn with the pizza. If you remove tassels off a cob of corn (but keep the husk on) and put it in the microwave for 3 mins on high it will cook perfectly (you may need to experiment with the length of time if your microwave is less or more powerful than ours).

Bacon and Egg Pie with minted crushed peas and chutney

Pies

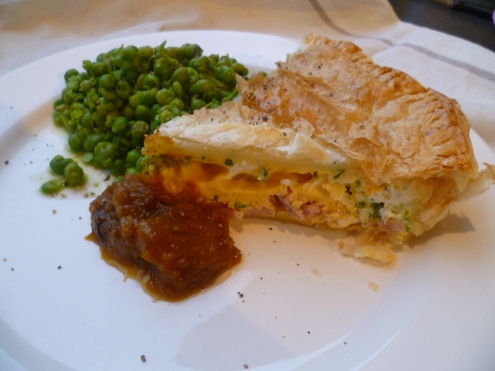
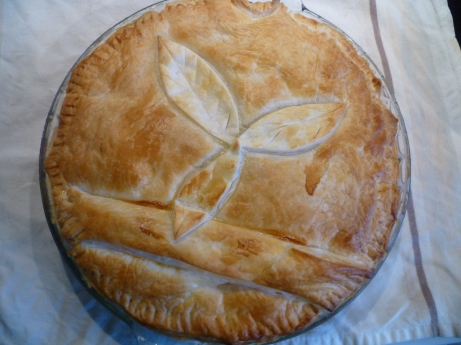
Anything with bacon in it is always a hit in our house. I have tried several versions of Bacon and Egg Pie and have rejected recipes in which you have to fry the bacon and onion separately, because it takes too long, and recipes in which you put the raw onion into the pie, because it still tastes raw even after the pie is cooked. This pie does not contain onion, but the chives and parsley add extra taste to it.

P1060784

Bacon and Egg Pie with minted crushed peas and chutney

Pie

3 sheets ready rolled flaky pasty

200g freedom farmed bacon, chopped

8 free range eggs

2 T each chopped chives and parsley

2 T milk

Chutney to serve

Minted crushed peas

2 c frozen peas

1/4 c chicken stock

Juice of 1/2 lemon

2 T chopped mint

  1. Lay the pastry out in single layers to defrost – this should only take about 5 minutes. Turn the oven to 180 C fan bake. Grease a round 25cm pie or flan dish.
  2. Once the pastry has defrosted (don’t try and bend it while still frozen – it will break) line the bottom of the dish and sides with pastry. Cut and slightly overlap the sheets to fit the dish.
  3. Sprinkle the chopped bacon over top of the pastry. Roughly beat the eggs, but don’t overdo it as it’s nice to have some chunks of white and yolk in the pie. Briefly mix in the chopped herbs. Pour over top of the bacon.
  4. Put a top on the pie, again cutting and overlapping the sheets to fit. If you are feeling fancy you could make some leaf shapes etc to go on top. Take a fork and press round the edges of the pie to seal the top to the bottom. Place the 2 T milk in the dish you used to mix the egg in – the little bit of leftover egg helps to make the top shiny. Glaze the top of the pie with the milk mix using a pastry brush.
  5. Bake for 20 minutes.
  6. Once the pie is just about cooked, start on the peas. Place the peas and water in a pot, bring to the boil and cook about 3 minutes. You can serve kids just the peas as they are. For adults, crush the peas roughly with a fork or potato masher. Don’t overdo it as you want a mix of whole and slightly crushed peas. Add the lemon juice and mint and serve. A hint to get more juice out of a lemon, particularly if it is cold, is to put it in the microwave for 10 or 15 seconds.
  7. Serve the adults food topped with cracked black pepper and chutney on the side.

P1060783

Hope you enjoy and unless your family are extra hungry there should be some leftovers for lunch the next day!

Kia ora!

Uncategorized

Welcome to my new project, where I share my attempts to plan and deliver fast and nutritious meals to my family each night. I hope that you enjoy the recipes and ideas which I will be sharing each week.

About me

I am a 30-something (OK – verging on 40-something) year old mother to two young girls, aged 4 and 6. Both my husband and I work full time, so each evening is a rush to serve up something tasty and healthy for dinner that can be cooked as quickly as possible.

In order to avoid food wastage and falling back on processed food, I am a big advocate of meal planning. Unfortunately I have learned through trial and error that if the meal is too complicated and takes too much energy, or if it is boring and not tasty, then sometimes I don’t stick to the plan.

This blog is going to be my attempt to plan child friendly, fast and tasty meals for my family. I figure if I’m going to come up with the recipes, I need somewhere to file them for later reference, so I might as well share them with others.

I have loved playing around with food since I was pretty young. As a 13 or 14 year old I would offer to cook meals for my family, trialing recipes and building up a cook book collection before I even left school. The cost to my poor parents was cleaning up the 50 utensils I somehow managed to incorporate into my cooking and then use the line “But I cooked dinner so I’m not doing the dishes!”. These days I am not much of a recipe follower. I tend to get an idea from something I have eaten, or a recipe I have seen and then tweak it to suit the ingredients I am willing to buy and the tastes of my family. Before I had kids I loved throwing dinner and lunch parties, spending all day producing food for a crowd. Now with kids, that is out of the question so the focus now is on food which isn’t boring for the adults, but that kids will eat, and which can be cooked quickly.

What this blog aims to do

  • Avoid wastage by trying to use almost all perishable ingredients in recipes for that week e.g: If one recipe uses half a cauliflower, then the other half will either be used in another recipe, or a suggestion on how you could use it for a lunch or weekend dinner will be offered.
  • Get my girls to try a variety of foods. Miss 6 is great at this (unless it is spicy!), Miss 4 is much fussier.
  • Keep our diet varied and healthy. I have a lucky dip system with a variety of key ingredients which I use to plan the menu each week so we aren’t eating the same thing week in and week out.
  • Make things easy for both you and myself, I figure that I can go back and use and recipes when we are having an awful week and I can’t be bothered dreaming up new ideas.
  • Use seasonal produce – yay for our local Saturday vege market!

What this blog is not:

  • A budget meal blog, or a gourmet cooking blog. The meals will be very much middle of the road. Sometimes there will be some flash ingredients like nice cuts of meat. Other times there will be recipes revolving around cheap ingredients like rice, veges and legumes.
  • Something I am being paid for. Therefore I am allowed to have weeks where sharing recipes is just too much!

Whose keen to join me!?